23rd July, 2018
A simple guide for adding Dagger2 to a modern MVVM Android project.

Intro
Dagger is always one of the first libraries I add when starting new Android projects. Not only does is simplify the process of adding further libraries, it doesn’t have many pre-requisites and it forces you to think about project architecture early on in the setup stages.
However, it’s hard to find a source which covers the latest features like @ContributesAndroidInjector & DaggerActivity in a Kotlin code base. This article aims to walk you through the implementation step by step, explaining the how and why along the way.
The app structure was based on Rahul Singh’s Clean Architecture project, which is a great example of a modern Android app architecture. This post focuses on the dependency injection section of the architecture and I recommend reading his post for a better understanding of the rest of the components that make a modern Android application.
I’m using MVVM here, but you can easily apply the steps to an MVP project as the Dagger implementation remains largely the same.
Implementing Dagger is actually quite straight forward when you take the time to understand each step. I’ll begin by showing the starting project, but feel free to skip to the Dagger Setup section if you’re just looking for a reference guide.
Pre-Dagger
To demonstrate the implementation of Dagger we’ll need a simple app that would benefit from the addition. Lets take a look at the starting app we’ll be improving with Dagger.
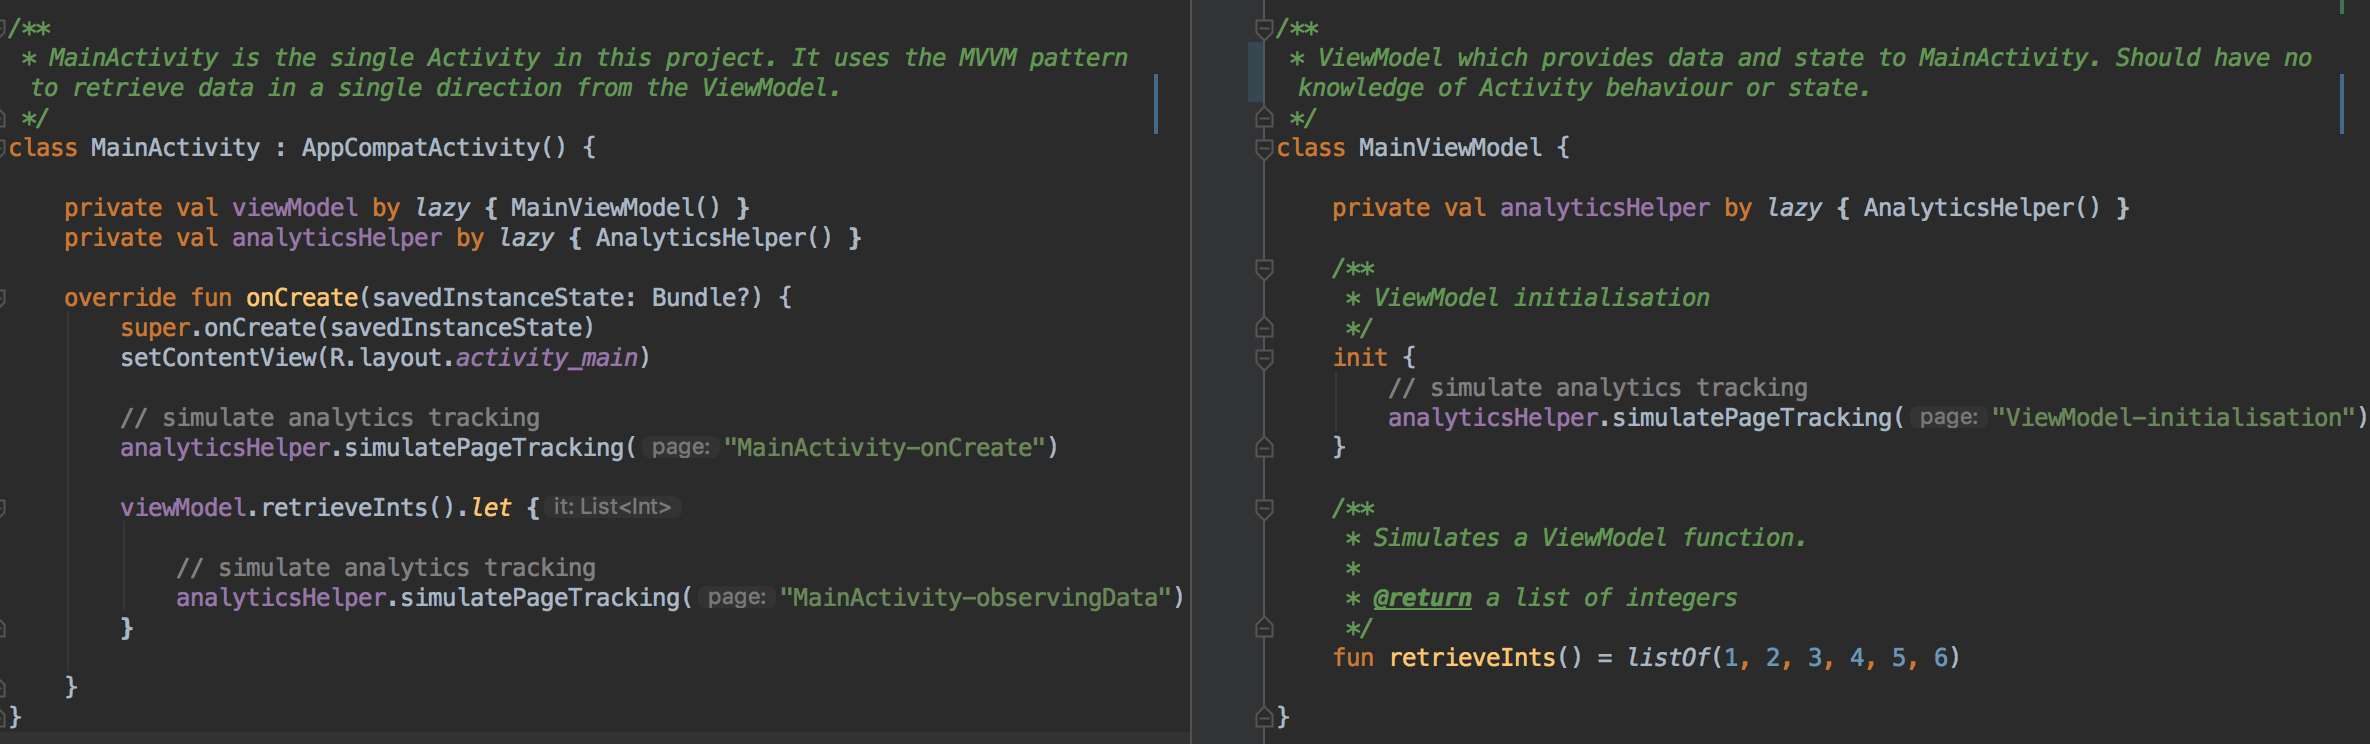
The app consists of an Application, MainActivity, MainViewModel and an AnalyticsHelper class. Analytics tracking is a common client request and can touch almost anywhere in your code base, so it’s a prime example of an object that would benefit from dependency injection — imagine changing the constructor of the AnalyticsHelper, then having to modify each class in which is was instantiated.
In our simplified project the AnalyticsHelper prints out the page parameter string along with the hash code of the object itself. We’ll use this hash code to demonstrate that we’re accessing the same instance of the object after implementing Dagger. Running the app at this point outputs the following logs:
Tracking page:
'Application-onCreate', from AnalyticsHelper:       **757408072**
'MainActivity-onCreate', from AnalyticsHelper:      **424961346**
'ViewModel-initialisation', from AnalyticsHelper:   **315976019**
'MainActivity-observingData', from AnalyticsHelper: **424961346**
As you can see, Application, Activity and ViewModel each have a different instance of the AnalyticsHelper class. After implementing Dagger, the same object instance will be used. This is one of the simplest changes we can demonstrate with Dagger, but is a great starting point. Lets get started!
Implementation
As always, we’ll need to add the required dependencies first. As we’re using Kotlin we need to ensure that kotlin-kapt is declared as a plugin so that annotation processing works correctly.
After a sync, we can specify our dependencies in a class annotated with @Module. We use the @Provides annotation on a function to do this, while @Singleton insures that the same instance is returned. Typically the function name is the class name prefixed with ‘provides’, but it’s not strictly necessary to do so.
Next, we’ll need to create an AppComponent interface. This is where we set module types, giving Dagger the dependencies it needs to build the object graph. We only have one custom module — AppModule, AndroidInjectionModule is an internal class which maps the graph to Activities (more about this later).
Now we need to modify our Application class, changing it’s super-class to DaggerApplication, implementing the applicationInjector function and using the @Inject annotation on the AnalyticsHelper parameter so that Dagger will construct the object for us.
In order to link MainActivity to the dependency graph, we’ll need a second Module which will contain individual Activity dependencies. Currently, we’re not declaring any specific dependencies, but we’ll create the structure now for future reference.
We use @ContributesAndroidInjector to set the modules for the MainActivity and will create a similar function for any additional Activities. These modules are submodules of AppModule, so any dependencies will only be available to the returned activity, whereas all AppModule dependencies will be available to the Activities.
Finally, ensure you add the ActivityModule to the list of modules declared in AppComponent
@Singleton @Component(modules = [(AndroidInjectionModule::class), **(ActivityBuilder::class)**, (AppModule::class)])
Singleton AnalyticsHelper
Now when we run the app, we can see that Dagger is returning the same AnalyticsHelper instance to Application and MainActivity!
'Application-onCreate', from AnalyticsHelper:       **757408072**.
'MainActivity-onCreate', from AnalyticsHelper:      **757408072**.
'ViewModel-initialisation', from AnalyticsHelper:   **705483104**.
'MainActivity-observingData', from AnalyticsHelper: **757408072**.
The exception being the ViewModel, which is still creating a new instance of the object. This requires a few extra steps, which we’ll cover in the future! In the meantime, check out the project in it’s current state below. Modern-Dagger repository
Thanks for reading, please feel free to suggest changes or improvements!