22nd August, 2018

I’ve recently been trying to write better documentation, and after discovering how simple this was for Java projects using Android Studio was upset to find out that this doesn’t work for Android projects written in Kotlin.
Until a couple of minutes later when I found Dokka, Jet-brain’s documentation engine for Kotlin. For anyone unlucky enough to not be completely free from Java, you’ll be pleased to know it also works with mixed Java/Kotlin projects.
For a sneak peak, here’s an example of Markdown documentation that I’ve generated from a simple project.
Preconditions
Unfortunately, good documentation doesn’t write itself, so the first step is to comment your code properly. Dokka will pick up comments from classes, methods and properties as well as highlighting param, return and other tag comments.
Thankfully, that is the only precondition that’s necessary in order to use Dokka. Once we’ve setup the Dokka plugin and specified a few plugin preferences, we’ll be able to run a Gradle task which exports nicely organised, hyperlinked documentation in a couple of different formats. It’s that simple! Lets get started…
Plugin Setup
For those with no patience, this commit shows the few necessary changes we need to make.
First, in the project level build.gradle file, add the following classpath dependency (using a Dokka version variable if desired):
buildscript {
    ext {
      dokkaVersion = '0.9.17'
    }

    repositories {
      jcenter()
    }

    dependencies {
      classpath "org.jetbrains.dokka:dokka-android-gradle-plugin:$dokkaVersion"
    }
}
Now, for each module you would like to generate documentation for, add this plugin beneath the Kotlin kapt plugin in the build.gradle file. Followed by the a Dokka configuration block.
This will most likely be the app module build.gradle for single module projects.
apply plugin: ‘kotlin-android-extensions’ apply plugin: ‘kotlin-kapt’ apply plugin: ‘org.jetbrains.dokka-android’
…
android {

    ...

    dokka {
        outputFormat = 'html'
        outputDirectory = "$buildDir/javadoc"
    }

}
outputFormat: We have a choice of 6 output formats including html, javadoc, and a few types of markdown.
outputDirectory: Choose the location you would like the documentation to be built to.
You can find a list of all Dokka config options on the Documentation page, but here are a few useful examples to get you started:
// Do not output deprecated members
skipDeprecated = true

// Emit warnings about not documented members.
reportUndocumented = true
Building the docs
That’s all! After syncing your project you should see a new Gradle task which will generate the documentation for you.
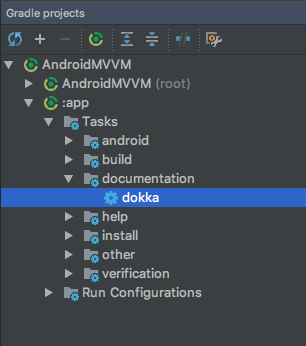
Run the Gradle task from the Android Studio Gradle window or from the terminal with ./gradlew dokka, and navigate to the output directory you specified in the config. (You will need to switch to the Project view in order to see the output folder from within Android Studio).
By default, the above output directory will output docs to the ‘project > app > build > javadoc > app’ folder.
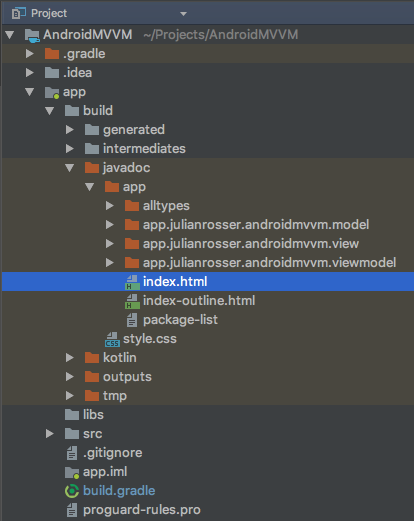
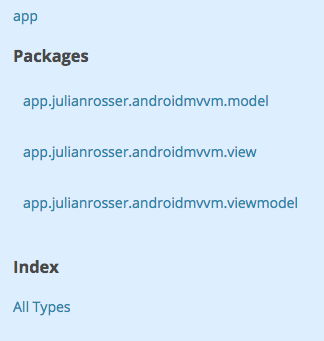
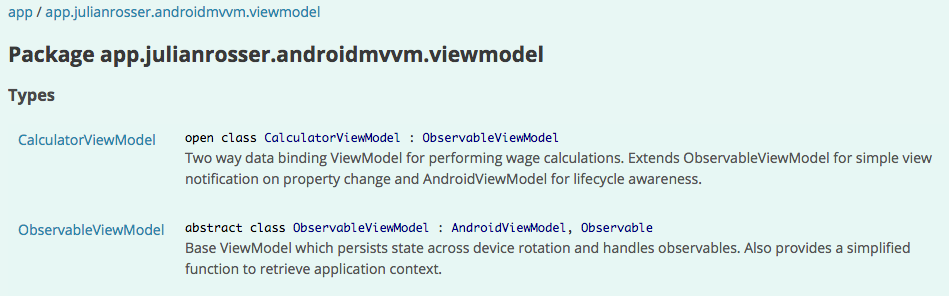
Open the index.html file in a browser and admire your new documentation, organised by package.
 is an example of markdown formatted documentation hosted on a public GitHub repository*](https://cdn-images-1.medium.com/max/2000/1*-VzQsFjFmYqoDKUrlZJLgQ.png)
Now we face the harder problem of getting people to actually read our docs!
Thanks for reading, please let me know if I’ve missed anything or if you have any tips for using Dokka!